
I enjoy building and flying fighter kites. They’ve been a source of great joy for me over the years. The Dragonfly Fighter is my first fighter kite design. In fact, I used one to win my very first official fighter kite match. This is a small fighter kite; it has a 16 inch spine length and an 18 inch wingspan. It flies well in winds between 4 and 10 miles per hour. It isn’t the fastest of fighters, but it’s simple to construct, tracks well, and is very controllable. If you’re flying a line touch competition, speed is great, but control is better. The trailing edge is curved, which reduces sail flutter. I built this example out of mylar, with a carbon rod for the bow and a bamboo spine. You can get the materials you’ll need from kite shops, as well as hardware stores, hobby stores, or on-line from kite retailers.

The Dragonfly Fighter Kite
I designed the Dragonfly to have the bow glued into the sail. I use a .05 graphite rod for the bow, and I shape my own bamboo spines. I make a half pattern out of poster board, as shown below. A line drawn between the wingtips will cross the spine 1″ above the spine center. The bow will cross the spine 2.5″ below the nose of the kite.

Pattern, tools, contact cement, sail material and bamboo I shaped for the spine.
I have a curved ruler to make the trailing edge. You can build it with a straight edge, but part of the character of this kite is seeing how that curve looks in the air. The curve at the leading edge is created by using a bow to mark where the curved area will be, and allowing extra material to fold over the bow. This creates a “shoulder” area where the leading edge from the nose of the kite meets the spot where the bow enters it. This spot needs to be reinforced with tape. I put a 1/4″ wide strip of tape along the leading edge on the back of the sail between the shoulder and nose area, and I use a piece of tape to fold over the nose, a piece at the end of the spine, tape over the shoulders and the spot on the spine where the sail will be pierced for the bridle lines. Clear packing tape works well when you build the kite out of mylar like I did in this example. Stronger material may need stronger reinforcement. When I build this kite, the contact cement holds well, and I don’t feel the need to reinforce the wingtips! (If you want to, adding a little tape to the wingtips won’t affect the flight of the kite.)
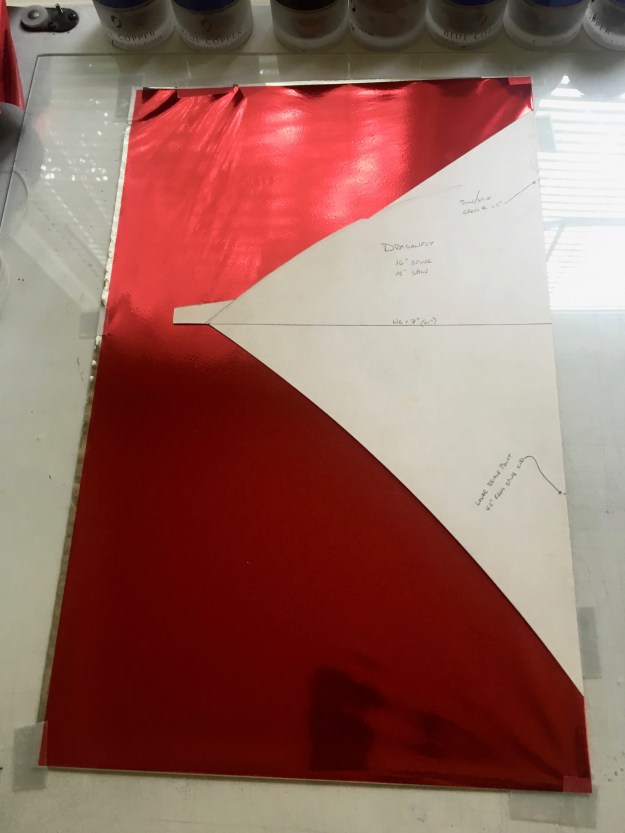
The half pattern ensures sail symmetry.
Fold the sail material in half, smooth it out and tape it to your work surface. I use a sheet of tempered glass on my drafting table to build my kites on. Cut carefully around the template, using rulers as needed to make a smooth edge. When using mylar or paper, if you nick the edge of the sail , it creates a weak spot that can tear from the edge toward the center of the kite when it’s out in the wind, so be careful and steady and use a sharp blade.

The sail, once cut out, is symmetrical and the material will be surprisingly strong.
Once the sail is cut, I spray some water on the glass, and use an old business card to smooth the sail down on my glass work surface, then dry off the excess. In the example above, the front side of the mylar is red, and the back is silver. You have to build it red side down. The first thing to go on the sail is a 5.5″ by 1/4″ piece of clear packing tape which goes from the shoulder point carefully along the leading edge toward the nose on each side. The ends by the nose will be trapped by the nose reinforcements, and the other ends are covered by a reinforcement over the shoulders. This tape stiffens and strengthens the leading edge and reduces flutter.
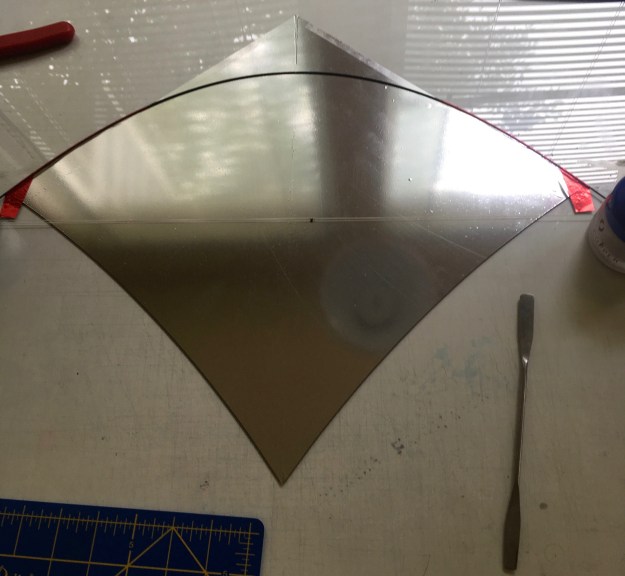
The sail smoothed down on the work surface, with the leading edge reinforced with tape, and the bow installed.
I use a bow setter to get the right curve to my bows. All a bow setter is is a length of line with an end cap at one end, another end cap on the line, and a moveable knot in the middle between the caps. The ends of the bow go into the caps, and the knot is moved until the bend in the bow is the desired shape. I like to make sure that the bow bends in a “natural” spot, since round graphite rods aren’t always as round as they could be, and they will prefer to flex more easily in a particular way. You can see the bow setter’s moveable knot in the picture above, but the end caps are trapped under weights. Contact cement is applied to the area of the bow that contacts the sail, and the sail itself where the bow is installed. I use wedge shaped makeup sponges to carefully apply contact cement. I have some extra material at the edge of the pattern to fold over and cement down at the wingtip. Using several careful cuts, I gently slice the extra sail above the bow and fold it smoothly over the bow. 10-12 of these cuts on each side will do. When the contact cement sets, the bow won’t move. As that is drying, I cut the spine to length and install it carefully under the bow. For the spine, I only apply contact cement to the spine itself. Once the spine is in, I weight it down and wait for the cement to dry.
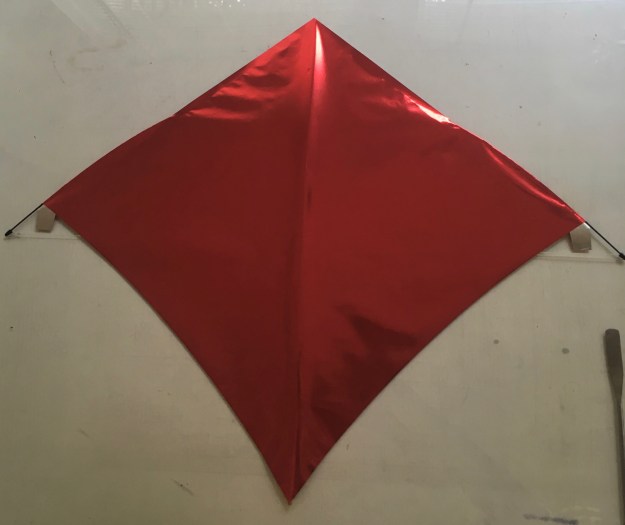
The finished sail with the bow and spine cemented in, from the front side.
When the cement dries, I remove the sail from the bench. I remove the bow setter, clip off the excess rod from the end, and trim the extra tab material at the wingtips. Next, I measure 1″ along the bow from the center of the spine, and put down a loose leaf page reinforcement beneath the bow. I use this as a guide as I melt through the front of the sail with a soldering iron to make clean and even holes for the yoke line of the three point bridle. When doing this, it’s important not to touch the bow with the tip of your hot soldering iron! When this is done, I put a piece of packing tape over the bow between these holes, and tie the bow down to the spine with a short piece of bridle line, and trim the excess, either fusing it or using super glue on it to make sure the knot is secure. Doing this prevents the bow from moving back an forth and slapping against the spine during flight when you release line, and I think it makes the kite smoother, quicker and more predictable in flight.

The back of the finished sail. You can just make out the clear tape reinforcements.
The final steps are to place tape reinforcements at the kite’s nose, tail, shoulders, and the point where the lower bridle point will be in your spine. At the shoulder, where the bow enters the leading edge, I put half of a 1/2″ by 1″ piece if packing tape under that area, then fold it over the shoulder and bow and smooth it down on the back side. At the nose, I take a 1″ by 2″ piece of tape, put the nose down over it so that the tape is smooth on the front of the sail, and the nose rests halfway onto the 1″ width of the tape, with one of the long edges under the kite. From the top of the spine, cut the tape outward from either edge of the spine in a wedge shape. Fold that over the top of the spine, and fold the remaining tape over the leading edge and the spine. Both sides should cover the spine. Smooth it down carefully as you do it. The tape is difficult to see in the picture above, but the reinforcement is there, and it makes the kite much more durable.
I use a three point bridle, with the yoke like tied to the bow 1″ on either side of the spine. The yoke line is attached to the bow at these places, and stands 3″ from the face of the kite at it’s center. I use gel formula super glue to secure the yoke line to the bow. The third bridle point is on the spine, 4.5″ above the bottom end of the spine. Tie a loop at one end of the other bridle line, and use a prussik knot (wound twice so it will lock down) to connect the lower bridle leg to the yoke line. The other end will be run through the marked ends of the sail at the spine where you put down your tape reinforcement, and tied down. A loop of bridle line can be attached to the long bridle leg using the same knot used to connect the long bridle leg to the yoke line. Then the kite is ready to tune and fly.
The Dragonfly has always been fun for me to build and fly. I can build a mylar kite like the one shown here in 3 to 4 hours. That means I can build one in the morning and fly it the same afternoon. They’re durable enough to give you hours of enjoyment. They can be built of more durable materials using the same methods, and they scale up well if you want a larger kite – for a .06 bow, the wingspan can be 20″ and though I’ve never scaled one up that large, a Dragonfly with a 24″ wingspan could use a .07 or possibly a .08 graphite rod for a bow. If you split bamboo for the spine, make sure the spine is strong enough to match your bow. I like the feel of the kite at this small size though. On a light line, it flies beautifully.
I hope you enjoy the Dragonfly fighter!

